Or
Where:
- radius of the circle,
- circle diameter,
- circumference,
- Pi (),
As a rule, the value () up to the second sign (3,14) is used for calculation, but in some cases, this may not be enough.
- Truncated cone with accessible vertex: A cone that can be used to determine the position of the vertex.
- A truncated cone with an inaccessible vertex: A cone, during the construction of which the position of the vertex is difficult to determine, in view of its remoteness.
- Triangulation: a method for constructing unfolded surfaces of non-developing, conical, general form and with a cusp.
- It should be remembered: Regardless of whether the surface under consideration is developable or non-developable, only an approximate development can be plotted graphically. This is due to the fact that in the process of removing and postponing dimensions and performing other graphic operations, errors are inevitable due to the design features of drawing tools, physical abilities eyes and errors from replacing arcs with chords and angles on the surface with flat angles. Approximate developments of curves of non-developing surfaces, in addition to graphical errors, contain errors obtained due to the mismatch of the elements of such surfaces with flat approximating elements. Therefore, in order to obtain a surface from such a development, in addition to bending, it is necessary to partially stretch and compress its individual sections. Approximate scans, when carefully performed, are accurate enough for practical purposes.
The material presented in the article implies that you have an idea about the basics of drawing, know how to divide a circle, find the center of a segment with a compass, remove / transfer dimensions with a compass, use patterns, and the corresponding reference material. Therefore, the explanation of many points in the article is omitted.
Construction of a cylinder sweep
Cylinder

A body of revolution with the simplest unfolding, having the shape of a rectangle, where two parallel sides correspond to the height of the cylinder, and the other two parallel sides correspond to the circumference of the bases of the cylinder.
Truncated cylinder (fish)

truncated cylinder
Preparation:
- To create a sweep, draw a quadrilateral ACDE full size (see drawing).
- Let's draw a perpendicular BD, out of plane AC exactly D, cutting off from the construction the straight part of the cylinder ABDE which can be adjusted as needed.
- From the center of the plane CD(dot O) draw an arc with a radius of half the plane CD, and divide it into 6 parts. From the resulting points O, draw perpendicular lines to the plane CD. From points on a plane CD, draw straight lines perpendicular to the plane BD.
Building:
- Line segment BC transfer, and turn it into a vertical. From a point B, vertical BC, draw a ray perpendicular to the vertical BC.
- Take the size with a compass C-O 1 B, point 1 . We remove the size B1-C1 1 .
- Take the size with a compass O 1 -O 2, and set aside on the beam, from the point 1 , point 2 . We remove the size B2-C2, and set aside the perpendicular from the point 2 .
- Repeat until point is delayed D.
- The resulting verticals, from the point C, vertical BC, to the point D- connect with a curved curve.
- The second half of the sweep is mirrored.
Any cylindrical slices are constructed in a similar way.
Note: Why "Rybina"- if you continue building a sweep, while building half from the point D, and the second in reverse side from the vertical BC, then the resulting pattern will look like a fish, or a fish tail.
Construction of a development of a cone
Cone

The reaming of the cone can be done in two ways. (See drawing)
- If the size of the side of the cone is known, from the point O, an arc is drawn with a compass, with a radius equal to the side of the cone. Two points are plotted on the arc ( A 1 And B1 ABOUT.
- A life-size cone is built, from a point O, exactly A, a compass is placed, and an arc is drawn passing through the points A And B. Two points are plotted on the arc ( A 1 And B1), at a distance equal to the circumference and connected to a point ABOUT.
For convenience, half of the circumference can be set aside from, on both sides of the centerline of the cone.
A cone with a displaced apex is constructed in the same way as a truncated cone with displaced bases.
- Construct the circumference of the base of the cone in top view, full size. Divide a circle by 12 or more equal parts, and put them on a straight line one by one.
A cone with a rectangular (polyhedral) base.

Cones with polyhedral base
- If the cone has an even, radial base: ( When constructing a circle in a top view, by setting the compass to the center, and outlining the circle along an arbitrary vertex, all the vertices of the base fit on the arc of the circle.) Construct a cone, by analogy with the development of an ordinary cone (build the base in a circle, from a top view). Draw an arc from a point O. Put a point in an arbitrary part of the arc A 1, and alternately put all the faces of the base on the arc. The end point of the last face will be B1.
- In all other cases, the cone is built according to the principle of triangulation ( see below).
Truncated cone with accessible apex

Frustum
Construct a truncated cone ABCD full size (See drawing).
Parties AD And BC continue until the intersection point appears O. From the point of intersection O, draw arcs, with radius OB And OC.
On the arc OC, set aside the circumference DC. On the arc OB, set aside the circumference AB. Connect the resulting points with segments L1 And L2.
For convenience, half of the circumference can be set aside from, on both sides of the centerline of the cone.
How to plot the circumference of an arc:
- With the help of a thread, the length of which is equal to the circumference.
- With the help of a metal ruler, which should be bent “in an arc”, and put the appropriate risks.
Note: It is not at all necessary that the segments L1 And L2, if they continue, will converge at a point O. To be completely honest, they should converge, but taking into account the corrections for the errors of the tool, material and eye, the intersection point may be slightly lower or higher than the top, which is not a mistake.
Truncated cone with a transition from a circle to a square

Cone with a transition from a circle to a square
Preparation:
Construct a truncated cone ABCD full size (see drawing), build a top view ABB 1 A 1. Divide the circle into equal parts (in the above example, the division of one quarter is shown). points AA 1-AA 4 connect segments with a dot A. Hold Axis O, from the center of which draw a perpendicular O-O 1, with a height equal to the height of the cone.
Below, the primary dimensions are taken from the top view.
Building:
- Remove size AD and build an arbitrary vertical AA0-AA1. Remove size AA0-A, and put an "approximate point" by making a go-ahead with a compass. Remove size A-AA 1, and on the axis O, from the point O O 1 AA 1, to the expected point A. Connect dots with line segments AA 0 -A-AA 1.
- Remove size AA 1-AA 2, from the point AA 1 put a "approximate point", making a go-ahead with a compass. Remove size A-AA 2, and on the axis O, from the point O, postpone the segment, remove the size from the received point to the point O 1. Make a go-ahead with a compass from a point A, to the expected point AA 2. Draw a segment A-AA 2. Repeat until the segment is delayed A-AA 4.
- Remove size A-AA 5, from the point A set a point AA5. Remove size AA 4-AA 5, and on the axis O, from the point O, postpone the segment, remove the size from the received point to the point O 1. Make a go-ahead with a compass from a point AA 4, to the expected point AA5. Draw a segment AA 4-AA 5.
Build the rest of the segments in the same way.
Note: If the cone has an accessible vertex, and SQUARE foundation - then the construction can be carried out according to the principle truncated cone with accessible top, and the base is cones with a rectangular (polyhedral) base. The accuracy will be lower, but the construction is much simpler.
Instead of the word “pattern”, “sweep” is sometimes used, but this term is ambiguous: for example, a reamer is a tool for increasing the diameter of a hole, and in electronic technology there is a concept of a reamer. Therefore, although I am obliged to use the words “cone sweep” so that search engines can find this article using them, I will use the word “pattern”.
Building a pattern for a cone is a simple matter. Let us consider two cases: for a full cone and for a truncated one. On the picture (click to enlarge) sketches of such cones and their patterns are shown. (I note right away that we will only talk about straight cones with a round base. We will consider cones with an oval base and inclined cones in the following articles).
1. Full taper
Designations:

Pattern parameters are calculated by the formulas:
;
;
Where  .
.
2. Truncated cone
Designations:
Formulas for calculating pattern parameters:  ;
; ;
;
;
Where  .
.
Note that these formulas are also suitable for the full cone if we substitute .
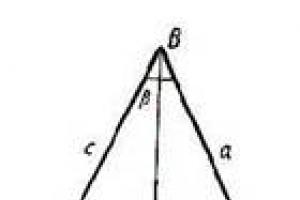
 Sometimes, when constructing a cone, the value of the angle at its vertex (or at the imaginary vertex, if the cone is truncated) is fundamental. The simplest example is when you need one cone to fit snugly into another. Let's denote this angle with a letter (see picture).
In this case, we can use it instead of one of the three input values: , or . Why "together O", not "together e"? Because three parameters are enough to construct a cone, and the value of the fourth is calculated through the values of the other three. Why exactly three, and not two or four, is a question that is beyond the scope of this article. A mysterious voice tells me that this is somehow connected with the three-dimensionality of the “cone” object. (Compare with the two initial parameters of the two-dimensional circle segment object, from which we calculated all its other parameters in the article.)
Below are the formulas by which the fourth parameter of the cone is determined when three are given.
4. Methods for constructing a pattern
- Calculate the values on the calculator and build a pattern on paper (or immediately on metal) using a compass, ruler and protractor.
- Enter formulas and source data into a spreadsheet (for example, Microsoft Excel). The result obtained is used to build a pattern using a graphic editor (for example, CorelDRAW).
- use my program, which will draw on the screen and print out a pattern for a cone with given parameters. This pattern can be saved as a vector file and imported into CorelDRAW.
5. Not parallel bases
As far as truncated cones are concerned, the Cones program still builds patterns for cones that have only parallel bases.
For those who are looking for a way to construct a truncated cone pattern with non-parallel bases, here is a link provided by one of the site visitors:
A truncated cone with non-parallel bases.
Sometimes the task arises - to make a protective umbrella for an exhaust or chimney, an exhaust deflector for ventilation, etc. But before you start manufacturing, you need to make a pattern (or scan) for the material. On the Internet there are all sorts of programs for calculating such sweeps. However, the problem is so easy to solve that you will quickly calculate it with a calculator (on a computer) than you will search, download and deal with these programs.
Let's start with a simple option - the development of a simple cone. The easiest way to explain the principle of calculating the pattern is with an example.
Suppose we need to make a cone with a diameter of D cm and a height of H centimeters. It is quite clear that a circle with a cut segment will act as a blank. Two parameters are known - diameter and height. Using the Pythagorean theorem, we calculate the diameter of the workpiece circle (do not confuse it with the radius finished cones). Half diameter (radius) and height form right triangle. That's why:

So, now we know the radius of the workpiece and we can cut out the circle.
Calculate the angle of the sector to be cut out of the circle. We argue as follows: The diameter of the workpiece is 2R, which means that the circumference is Pi * 2 * R - i.e. 6.28*R. We denote it by L. The circle is complete, i.e. 360 degrees. And the circumference of the finished cone is Pi * D. We denote it by Lm. It is, of course, less than the circumference of the workpiece. We need to cut a segment with an arc length equal to the difference between these lengths. Apply the ratio rule. If 360 degrees gives us the full circumference of the workpiece, then the desired angle should give the circumference of the finished cone.

From the ratio formula, we obtain the size of the angle X. And the cut sector is found by subtracting 360 - X.
From a round blank with a radius R, a sector with an angle (360-X) must be cut. Be sure to leave a small strip of overlapping material (if the cone mount will overlap). After connecting the sides of the cut sector, we get a cone of a given size.
For example: We need a chimney hood cone with a height (H) of 100 mm and a diameter (D) of 250 mm. According to the Pythagorean formula, we obtain the radius of the workpiece - 160 mm. And the circumference of the workpiece, respectively, 160 x 6.28 = 1005 mm. At the same time, the circumference of the cone we need is 250 x 3.14 = 785 mm.
Then we get that the ratio of angles will be: 785 / 1005 x 360 = 281 degrees. Accordingly, it is necessary to cut the sector 360 - 281 = 79 degrees.
Calculation of the pattern blank for a truncated cone.
Such a detail is sometimes needed in the manufacture of adapters from one diameter to another or for Volpert-Grigorovich or Khanzhenkov deflectors. They are used to improve draft in a chimney or ventilation pipe.
The task is slightly complicated by the fact that we do not know the height of the entire cone, but only its truncated part. In general, there are three initial numbers: the height of the truncated cone H, the diameter of the lower hole (base) D, and the diameter of the upper hole Dm (at the cross section of the full cone). But we will resort to the same simple mathematical constructions based on the Pythagorean theorem and similarity.

Indeed, it is obvious that the value (D-Dm) / 2 (half the difference in diameters) will relate with the height of the truncated cone H in the same way as the radius of the base to the height of the entire cone, as if it were not truncated. We find the total height (P) from this ratio.
(D – Dm)/ 2H = D/2P
Hence Р = D x H / (D-Dm).

Now knowing the total height of the cone, we can reduce the solution of the problem to the previous one. Calculate the development of the workpiece as if for a full cone, and then “subtract” from it the development of its upper, unnecessary part. And we can calculate directly the radii of the workpiece.
We obtain by the Pythagorean theorem a larger radius of the workpiece - Rz. This Square root from the sum of the squares of the heights P and D/2.
The smaller radius Rm is the square root of the sum of squares (P-H) and Dm/2.
The circumference of our workpiece is 2 x Pi x Rz, or 6.28 x Rz. And the circumference of the base of the cone is Pi x D, or 3.14 x D. The ratio of their lengths will give the ratio of the angles of the sectors, if we assume that the full angle in the workpiece is 360 degrees.
Those. X / 360 = 3.14 x D / 6.28 x Rz
Hence X \u003d 180 x D / Rz (This is the angle that must be left to get the circumference of the base). And you need to cut accordingly 360 - X.

For example: We need to make a truncated cone 250 mm high, base diameter 300 mm, top hole diameter 200 mm.
We find the height of the full cone P: 300 x 250 / (300 - 200) = 600 mm
According to the Pythagorean method, we find the outer radius of the workpiece Rz: The square root of (300/2) ^ 2 + 6002 = 618.5 mm
By the same theorem, we find the smaller radius Rm: The square root of (600 - 250)^2 + (200/2)^2 = 364 mm.
We determine the angle of the sector of our workpiece: 180 x 300 / 618.5 = 87.3 degrees.
On the material we draw an arc with a radius of 618.5 mm, then from the same center - an arc with a radius of 364 mm. The arc angle can have approximately 90-100 degrees of opening. We draw radii with an opening angle of 87.3 degrees. Our preparation is ready. Don't forget to allow for seam edges if they overlap.
The development of the surface of the cone is a flat figure obtained by combining the side surface and the base of the cone with a certain plane.
Sweep construction options:
Development of a right circular cone
The development of the lateral surface of a right circular cone is a circular sector, the radius of which is equal to the length of the generatrix of the conical surface l, and central cornerφ is determined by the formula φ=360*R/l, where R is the radius of the circumference of the cone base.
In a number of problems of descriptive geometry, the preferred solution is the approximation (replacement) of a cone by a pyramid inscribed in it and the construction of an approximate sweep, on which it is convenient to draw lines lying on a conical surface.
Construction algorithm
- We inscribe a polygonal pyramid into the conical surface. The more side faces of the inscribed pyramid, the more accurate the correspondence between the actual and approximate scan.
- We build a development of the side surface of the pyramid using the triangle method. The points belonging to the base of the cone are connected by a smooth curve.
Example
In the figure below, a regular hexagonal pyramid SABCDEF is inscribed in a right circular cone, and an approximate development of its lateral surface consists of six isosceles triangles - the faces of the pyramid.

Consider a triangle S 0 A 0 B 0 . The lengths of its sides S 0 A 0 and S 0 B 0 are equal to the generatrix l of the conical surface. The value A 0 B 0 corresponds to the length A'B'. To build a triangle S 0 A 0 B 0 in an arbitrary place of the drawing, we set aside the segment S 0 A 0 =l, after which we draw circles with a radius S 0 B 0 =l and A 0 B 0 = A'B' from points S 0 and A 0 respectively. We connect the point of intersection of circles B 0 with points A 0 and S 0 .
The faces S 0 B 0 C 0 , S 0 C 0 D 0 , S 0 D 0 E 0 , S 0 E 0 F 0 , S 0 F 0 A 0 of the SABCDEF pyramid are built similarly to the triangle S 0 A 0 B 0 .
Points A, B, C, D, E and F, lying at the base of the cone, are connected by a smooth curve - an arc of a circle, the radius of which is equal to l.
Oblique cone development
Consider the procedure for constructing a sweep of the lateral surface of an inclined cone by the approximation method.

Algorithm
- We inscribe the hexagon 123456 in the circle of the base of the cone. Connect the points 1, 2, 3, 4, 5 and 6 with the vertex S. The pyramid S123456 constructed in this way is, with a certain degree of approximation, a replacement for the conical surface and is used as such in further constructions.
- We determine the natural values of the edges of the pyramid using the method of rotation around the projecting line: in the example, the i-axis is used, which is perpendicular to the horizontal projection plane and passes through the vertex S.
So, as a result of the rotation of the edge S5, its new horizontal projection S'5' 1 takes a position in which it is parallel to the frontal plane π 2 . Accordingly, S''5'' 1 is the natural value of S5. - We construct a development of the lateral surface of the pyramid S123456, consisting of six triangles: 0 1 0 . The construction of each triangle is performed on three sides. For example, △S 0 1 0 6 0 has the length S 0 1 0 =S''1'' 0 , S 0 6 0 =S''6'' 1 , 1 0 6 0 =1'6'.
The degree of correspondence of the approximate sweep to the actual one depends on the number of faces of the inscribed pyramid. The number of faces is chosen based on the ease of reading the drawing, the requirements for its accuracy, the presence of characteristic points and lines that need to be transferred to the scan.
Transferring a line from the surface of a cone to a development
The line n lying on the surface of the cone is formed as a result of its intersection with a certain plane (figure below). Consider the algorithm for constructing line n on the sweep.

Algorithm
- Find the projections of points A, B and C, in which the line n intersects the edges of the pyramid inscribed in the cone S123456.
- We determine the actual size of the segments SA, SB, SC by rotating around the projecting line. In this example, SA=S''A'', SB=S''B'' 1 , SC=S''C'' 1 .
- We find the position of points A 0 , B 0 , C 0 on the corresponding edges of the pyramid, setting aside segments S 0 A 0 =S''A'', S 0 B 0 =S''B'' 1 , S 0 C 0 =S''C'' 1 .
- We connect points A 0 , B 0 , C 0 with a smooth line.
Truncated cone development
The method for constructing a sweep of a right circular truncated cone, described below, is based on the principle of similarity.

Shortcut http://bibt.ru
Development of a truncated cylinder and a cone.
To build a scan of a truncated cylinder, a truncated cylinder is drawn in two projections (front view and top view), then the circle is divided into an equal number of parts, for example, 12 (Fig. 243). On the right side of the first projection, a straight line AB is drawn, equal to the straightened circumference, and divided into the same number of equal parts, i.e., 12. From the division points 1, 2, 3, etc., on the AB line, restore perpendiculars, and from points 1, 2, 3, etc., lying on a circle, draw straight lines parallel to the axial line until they intersect with an inclined section line.
Rice. 243. Construction of a flat pattern of a truncated cylinder
Now, on each perpendicular, segments are laid with a compass upward from the line AB, equal in height to the segments indicated on the projection of the front view by the numbers of the corresponding points. For clarity, two such segments are marked with curly brackets. The obtained points on the perpendiculars are connected by a smooth curve.
The construction of a development of the lateral surface of the cone is shown in fig. 244, a. A life-size lateral projection of the cone is drawn according to the given dimensions of diameter and height. The length of the generatrix of the cone, indicated by the letter R, is measured with a compass. An arc is drawn with a compass with a fixed radius around the center O, which is the extreme point of an arbitrarily drawn straight line OA.
From point A along the arc lay off (with a compass in small segments) the length of the unfolded circle, equal to πD. The resulting extreme point B is connected to the center O of the arc. The figure AOB will be a development of the lateral surface of the cone.
The development of the lateral surface of the truncated cone is built, as shown in Fig. 244b. According to the height and diameters of the upper and lower bases of the truncated cone, a life-size profile of the truncated cone is drawn. The generators of the cone continue until they intersect at point O. This point is the center, arcs are drawn from it equal to the circumferences of the base and apex of the truncated cone. To do this, divide the base of the cone into seven parts. Each such part, i.e., 1/7 of the diameter D, is laid along a large arc 22 times and a straight line is drawn from the resulting point B to the center of the arc O. After connecting the point O with points A and B, a scan of the lateral surface of the truncated cone is obtained.